Pages

Tuesday, May 29, 2012

Photographing quilts

Boy, oh boy.  Photographing quilts is not easy.  No, sir.  Well now, it didn't help that it was 100 degrees today (no joke---in May, in New York---weird).  But I was under a self-imposed deadline to get some shots to my designer who is helping me with some quilt guild materials and trying to get some footage.

But, really.  You can imagine, in a house with four children 7 and under, there are not a whole lot of interior options for shooting.  And I couldn't find the dang clothespins which would have helped for getting quilts to hang on the fence.  Luckily, I had some hands to help fill in.


Then the dappled sunlight caused major lighting issues.


Then the quilts needed to be ironed.  Then certain people kept stepping on them. 


This was the best I came up with.  Still not great.  I will be working more on this.  Any advice welcome! Seriously.  No offense taken, I know they aren't great photos.


Wednesday, May 23, 2012

Quilt for Alma Grace in the Blogger's Quilt Festival


I have to admit, I have been a virtual lurker for a LONG time.  I am so inspired by all the amazing quilts and sewing I see out there in the blogosphere, but then sometimes feel overwhelmed by it all and think there is no room for one more. At the same time, the humanity of everyone's stories is so wonderful and localizing, that I vacillate and wonder...maybe there is room for me...

So, sitting here, in my bed, with my knee up on a pillow (recovering from ACL surgery) as my 4 children race around tormenting my husband, I feel like this could be IT.  I will do it! And I will start by posting a quilt in the festival (ok, typical, I am writing this two days after entries closed!! So, this is a "theoretical" entry!). Here goes...

I absolutely love the idea of an online quilt festival and am so grateful to Amy Ellis of Amy's Creative Side, for organizing this awesome way for the quilting community to connect!


This is a quilt I made for my niece, Alma Grace, for her birth October 29, 2006.  It remains, to this day, one of my favorite quilts I ever made.  I used prints and solids from my stash including some favorite Kaffe Fassett prints and stripes.  The colors were inspired by her fall birthday: greens, oranges, browns, yellows.


I love the way that the "Chevron" design came out in the final quilt layout.  At this distance in time, I am can't even remember if I knew that is how it would end up, but I do remember being really happy about it!


To quilt it, I used a great tool made by my original quilting teachers, Bob Silverman and Jim Helms, for making "fan" quilts.  You can find Bob, Jim and the tool here. Tying off all those threads at the bitter end was a lot of work, but it paid off---the back looked great!


Thanks for looking, and get yourself over the Blogger's Quilt Festival site to see all the amazing quilts that have been shown.  Truly, inspiring!

Saturday, April 23, 2011

Gratitude

This is when I will post a picture of something in my life I am grateful for.

Today I am grateful for the unending consistency of ocean waves. 

Thursday, April 14, 2011

Gratitude

This is when I will post a picture of something in my life I am grateful for.

Today I am grateful for homeschooling moments like this one: measuring our sister with Unifex cubes.


Red & White = Rose


At the end of March for three days ONLY, there was an amazing "happening" in New York City at the Park Avenue Armory:  651 red & white quilts made over the past 300 years all collected by one woman. And, FREE!

Joanna S. Rose was asked by her husband what she wanted for her 80th birthday and she answered, "Something I have never seen before and a gift for the city of New York."  You can read more about Mrs. Rose here.  This exhibition was the answer to those wishes.

Ok, let's be honest here.  I have four kids...the oldest is about to be six and, at the time of this show, the baby was a month old.  Sooo, even though I love quilting, I love reading about quilting, I love the history of quilting...I did not know about this show until the weekend it was happening.  And I have my wonderful Aunt Mary to thank for alerting me to it because I would have been so upset to have missed it.

Needless to say, it can be tough to come up with a babysitter on short notice.  I even tried to bribe some childless friends to come with me...I mean who doesn't want to spend the day with 4 little kids at an exhibition, right?   Well, not to be deterred, I did it on my own.  Thank God for double strollers and baby slings (and street parking a block away....oh yeah).


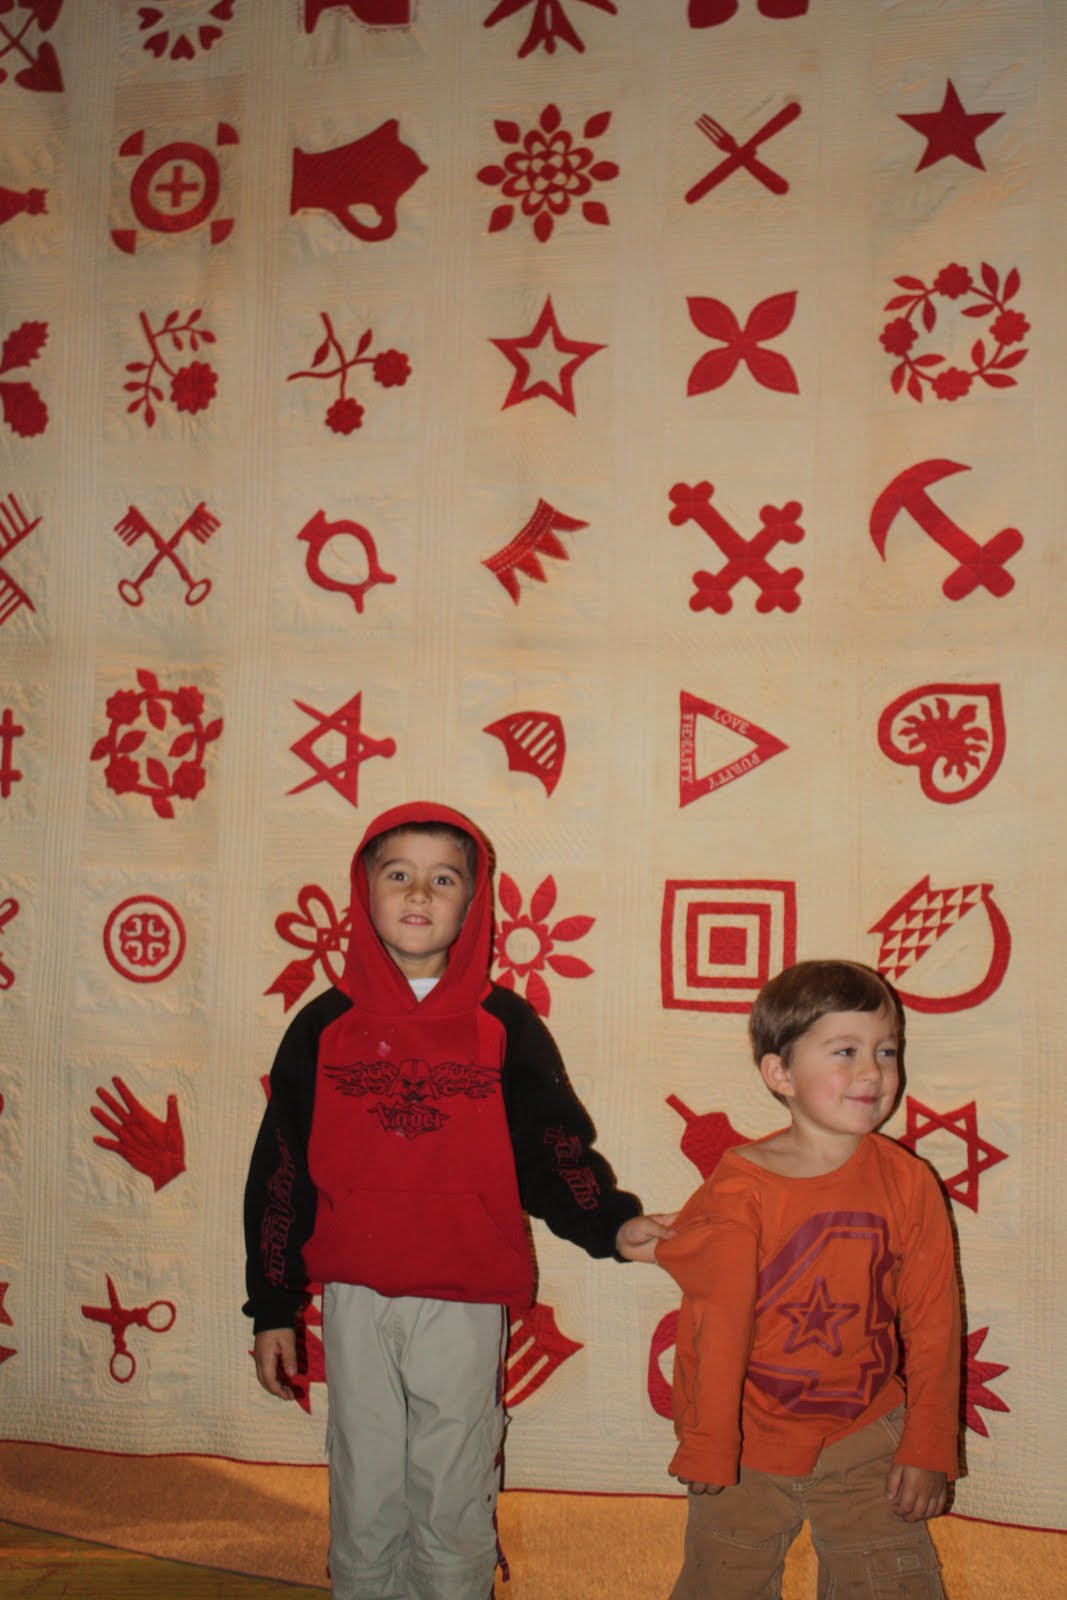
I have to say---even though they were the only kids there---this show was totally awesome for them to come to.  (Yes, we got LOTS of comments.  The most common was, "Are they all yours?" Followed by "Is the baby a girl? Oh good."  Followed by, "You are so brave.") It was like an incredible "I Spy".  The scale, the installation, the form, the subjects, and the textures were all so incredible that we had a great time walking around and talking about what we saw.

This applique quilt in particular was fun to pick out objects we recognized.


The one in the middle here was one of my favorites.


Henry liked this one:


Being in this football field-sized room filled with hundreds of these just stunning quilts brought up so many things that I love about quilting.  The history is so rich in terms of women's work and value, and I am so glad to see that it is finally getting its due.  Joanna Rose said that she originally began purchasing these quilts for $5 and $10!!  And to me, many of these quilts are as spectacular and simple as any mid-century Abstract painting.  The quilting community is so warm and friendly, and that was definitely in the air when we went.  I sat on a bench next to some lovely women who had come all the way from Oklahoma just for the show!

Ok, I could go on and on...and maybe at a later date I will, but now...I must pack.  Warm weather here we come!  If you want to read more, here are a few other blogs that did nice coverage (and with better pics than mine): Barbara Brackman, Manhattan Craft Room, and Pat Sloan.


The installation by Thinc Design deserves its own post...unbelievable.

Enjoy!

xoxo
Nell

Wednesday, April 13, 2011

Super Heroic Granola Bars

Here, as promised, is the recipe for my favorite granola bars.  As I mentioned, I used to bake professionally.  Mea culpa.  It took me a little while to get to this because the first time I made them at home I was halving a large commercial-sized recipe, but forgot to halve the oats.  So, the result was way drier than it should have been and I ended up with really delicious granola instead!  Again, yes, I did once bake professionally.


TREK Bars

*These delicious gluten-free, vegan, fruit and nut-packed granola bars are a great addition to anyone’s snack list, but they are especially great on the trail!  Enjoy.

**I thought about changing the measurements in the recipe to cups since everyone doesn’t necessarily own a kitchen scale, but then I realized that most of the ingredients are either being purchased bulk or in bags already marked, so I didn’t bother. 

***All ingredients can be found at your local health food store.  The nut and seeds in the bulk aisle and brown rice syrup is usually with alternative sugars.

Yields: 48

2 lbs rolled oats (Bob’s Red Mill “Gluten-free” Oats to ensure GF quality)
½ lb sesame seeds
½ lb sunflower seeds
½ lb pumpkin seeds
½ lb masserated coconut
½ lb dried cranberries
¼ lb (app 1 cup)  dried apricot  (diced)
¼ lb dried black currants or blueberries
1 T salt
10 oz finely chopped almonds
1.5 jars brown rice syrup
2 ¼ cup canola oil
1 T vanilla extract

Preheat over to 325 degrees.

Finely chop the apricots and almonds in a food processor.  Mix all dry ingredients together.  I put them in a large soup pot, as this amount is too big for my 5 qt countertop mixer. Add brown rice syrup, oil and vanilla.  Mix well. 

Lay a sheet of parchment paper on a baking tray.  Divide the mixture between two baking trays and spread out evenly.  Lay a piece of cling-wrap on top of the mixture and roll out with a rolling pin.  The goal here is to press the mixture across the whole tray to an even thickness. Remove cling-wrap and place in oven on bottom two racks.

Before rolling on the right.  After rolling on the left.

Bake for 30-35 minutes. 

You want the whole top to brown slightly.  Don’t worry if the edges get darker, you can cut these off before slicing.  Let cool and slice into 24 pieces per tray.  Can be kept on counter, wrapped for one week.  Also may be frozen.


***********************************************************************************

How did it go?  Any questions?  Let me know and enjoy!

xoxo
Nell

Friday, April 8, 2011

Gratitude

This is when I will post a picture of something in my life I am grateful for.

Today I am grateful for a sandbox outside the door and burgeoning brotherhood.